


Setting up your first grow tent feels a bit like assembling flat-pack furniture while reading the instructions in a foreign language. There are poles, clips, fabric, fans, filters, timers, and a whole lot of cables that seem determined to tangle themselves the moment you turn your back. The good news? A proper grow tent setup follows a logical order, and once you understand that order, the whole thing becomes surprisingly manageable — even satisfying. This guide walks you through the process from empty corner to ready-to-plant, with the kind of practical detail that actually helps when you're standing there wondering which piece goes where.
Why Start With a Grow Tent in the First Place
Before diving into the setup itself, it's worth understanding why the tent matters so much. A grow tent isn't just a fabric box — it's a controlled environment. It reflects light back onto your plants, traps warmth and humidity when you want it, and lets you vent everything out when you don't. For a first-timer, that controllability is the single biggest advantage over growing in an open room or a makeshift closet.
Tents also contain mess, block light leaks, and make pest management dramatically easier. Instead of fighting the conditions of your home, you're building a small, tailored climate from scratch. In practice, this means more predictable results, fewer nasty surprises, and a setup you can actually repeat next season.
Choosing the Right Size Before You Buy Anything Else
The most common beginner mistake happens before the tent is even unboxed: people pick the wrong size. Too small, and you'll be fighting your equipment forever. Too large, and you'll spend more on lights, fans, and electricity than you ever needed to.
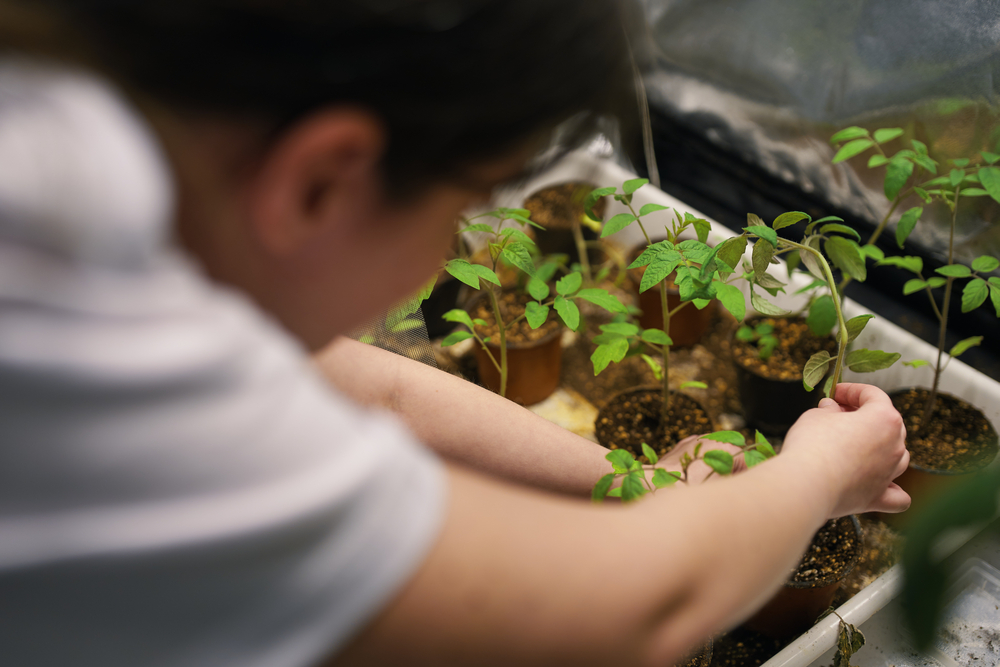
A practical rule of thumb: start with the number of plants you actually want to grow, not the number you daydream about. One or two plants fit comfortably in a 60×60 cm tent. Three to four do well in an 80×80 cm. If you're thinking bigger — say, four to six plants with a bit of training — a 100×100 cm tent gives you genuine working room.
Height matters just as much as footprint. You need vertical space for the light (with proper distance from the canopy), a carbon filter, ducting, and of course the plants themselves. Anything under 180 cm of internal height and you'll be cramped from day one. If the ceiling in the room allows it, 200 cm or more is the sweet spot.
One more thing worth pointing out: measure the room, not just the tent. Doors have to open, fans need airflow around them, and you'll want to reach the back panel without performing yoga. Leave at least 20 cm of clearance on the sides you'll access.
The Essential Equipment Checklist
Before you start assembling anything, get everything laid out. Trying to source a missing part halfway through setup kills momentum and leads to shortcuts. Your grow tent setup checklist should include:
- The tent itself (with all poles, corners, and clips)
- A grow light appropriate for the tent's footprint — LED is the standard choice for beginners because it runs cooler and draws less power
- An inline extraction fan, sized to the tent volume
- A carbon filter matched to the fan
- Ducting (usually aluminium, insulated if possible) and clamps
- An oscillating clip-on fan for internal air circulation
- A thermo-hygrometer — ideally one with min/max memory
- A mechanical or digital timer for the light
- A surge-protected power strip rated for your total wattage
- Zip ties, rope ratchets, and a roll of aluminium tape
That last line looks mundane but matters more than people expect. Rope ratchets let you raise and lower the light with one hand. Zip ties keep cables tidy and prevent them from sagging into the canopy. Aluminium tape seals any leaky duct joints — and there will be leaky joints.
Optional but genuinely useful extras include a humidifier for dry rooms, a dehumidifier for flowering stages, a small heater for winter setups, and a soft watering can with a narrow spout for reaching back corners without knocking plants around.
Step 1: Preparing the Space
A clean, level, stable floor is the foundation of everything that follows. Vacuum the area, wipe it down, and check that the surface can handle the weight of a full tent — wet soil, a reservoir of water, and lights all add up faster than you'd think. A 100×100 cm setup at full capacity can easily weigh 80 kg or more.
Put down a protective layer under the tent. A cheap plastic tray or a piece of pond liner works perfectly. Water spills are not a question of if but when, and a leaked reservoir onto a wooden floor is the kind of mistake you only want to make once.
Check the room's power situation. Count your outlets, confirm the circuit can handle your total wattage, and decide where the timer and power strip will live. Ideally, the power strip sits outside the tent, protected from humidity but close enough that cables don't have to stretch.
Finally, think about where the exhaust will go. The air coming out of your tent needs somewhere to exit — ideally a window, a vent, or at least a much larger room that won't heat up and humidify itself into a greenhouse. This decision affects where the tent faces and where the ducting runs, so sort it before the first pole goes up.
Step 2: Assembling the Tent Frame
Unpack everything and lay the poles out by type — vertical supports, horizontal crossbars, and corner connectors usually differ slightly in length and shape. Most manufacturers label them, but if yours doesn't, match lengths and count pieces against the manual.
Build the base rectangle first. Connect the four bottom poles using the corner connectors and stand it on the ground so you can check that it's square. From there, attach the vertical supports at each corner. Two people make this easier, but a single person can manage with patience — just don't force anything. Grow tent poles are usually steel-coated, and if something doesn't want to slide in, it's almost always misaligned rather than undersized.
Once the uprights are in, add the top rectangle. This is the moment the frame starts feeling like a tent. Install any internal crossbars designed to hold lights — these are crucial, because hanging a light from a top bar that wasn't designed for it is how you end up with a sagging roof and, eventually, a collapsed frame.
Slide the fabric cover over the frame. Zip it up from the bottom, working your way around. If the zippers feel tight, it usually means a pole is slightly out of place — stop and check rather than forcing the zip, because a torn zipper pull is a small disaster in an otherwise sealed tent.
Step 3: Installing the Ventilation System
Ventilation is the single most important part of a grow tent setup, and it's also the part first-timers most often get wrong. Plants need a constant exchange of air. Without it, humidity builds up, CO2 gets depleted, and heat from the light turns the tent into a sauna. A working extraction system solves all three problems at once.
Start with the carbon filter. Hang it inside the tent, near the top, using the rope ratchets or straps included with the tent. The filter goes first in the airflow chain — air passes through the filter, then into the fan, then out through the ducting. This order matters because it means only filtered air touches the fan, which keeps the fan clean and extends its lifespan.
Connect the filter to the inline fan using a short length of ducting. Use clamps at both ends and seal any gaps with aluminium tape. This is the moment where a cheap setup reveals itself: loose joints leak unfiltered air, which defeats the purpose of the filter. Take the extra minute.
From the fan, run ducting to the exit point — the tent's exhaust port, which typically sits near the top corner. Keep the run as short and straight as possible. Every 90-degree bend and every meter of duct reduces airflow noticeably. If you need to route ducting around obstacles, use gentle curves rather than sharp angles.
For air intake, most tents have passive vents near the bottom. The extraction fan creates negative pressure inside the tent, which pulls fresh air in through these vents automatically. That's usually enough for smaller tents. For larger setups, an active intake fan helps, but it should always be slightly weaker than the extraction — you want the tent to maintain negative pressure so that smells and air move out, not in.
Run the fan for a minute with the tent closed. The sides should suck inward slightly. If they bulge, the fan is pointing the wrong direction. (It happens. No judgment.)
Step 4: Hanging and Setting Up the Grow Light
With ventilation sorted, the light goes in next. Use the remaining rope ratchets to hang it from the designated crossbar. Center it over the floor area — not the floor of the tent, but the area your plants will actually occupy. If you're growing four plants in square formation, center the light over their collective canopy.
Distance matters enormously. Every LED manufacturer publishes a recommended hanging height for seedling, vegetative, and flowering stages, and those numbers exist for a reason. Too close, and you bleach leaves or stress plants into abnormal growth. Too far, and plants stretch, get leggy, and produce weak structure. For most mid-range LEDs, seedling stage sits around 50–70 cm from the canopy, veg drops to 40–50 cm, and flower runs 30–40 cm, but always check your specific model.
Make sure the light cable exits through the tent's dedicated cable port, not through a zipper or vent. Seal around the cable with the rubber grommet if your tent has one. Light leaks going in are surprisingly harmful during the flowering photoperiod — even small amounts of stray light at night can disrupt the plant's hormonal cycle.
Plug the light into the timer, and plug the timer into the power strip. Set the timer to your intended schedule (18/6 for vegetative growth, 12/12 for flowering is typical) and test it manually to confirm it's switching at the right times. A broken or miswired timer causing a 48-hour lights-on event is one of the classic beginner horror stories.
Step 5: Climate Control and Monitoring
Now that the heat-producing equipment is running, you can see what the tent actually does temperature-wise. Close everything up, turn on the light and the extraction, and let it stabilize for an hour. Then check the thermo-hygrometer.
Ideal ranges vary by growth stage, but broadly: temperatures between 22–28°C with the light on, slightly cooler when it's off, and relative humidity of 60–70% for young plants, dropping to 40–50% later in the cycle. If your tent runs too hot, increase the fan speed or extend the ducting to a cooler area. If it runs too cold — a real concern in winter — reduce extraction or add a small ceramic heater on a thermostat.
Place the thermo-hygrometer at canopy height, not floor height and not ceiling height. Readings at plant level are the only ones that matter. Tuck the sensor somewhere it won't be blocked by leaves as plants grow.
Clip the oscillating fan to one of the upper poles, angled to move air gently across the canopy. It shouldn't blast the plants — a steady ruffle is enough. This internal air movement strengthens stems, deters fungal issues, and evens out microclimates inside the tent. Keep it well away from the light and extraction so the airflow pattern stays predictable.
A humidifier or dehumidifier, if you need one, goes outside the tent when possible, with its output or intake running through a sealed port. Keeping electrical devices out of the humid environment extends their life.
Step 6: Final Checks Before Planting
This is the boring-but-critical stage. Walk around the tent with the lights off and look for light leaks. Any pinholes, loose seams, or gaps around ports should be taped. During flowering, these matter; during veg, less so, but habits formed early pay off later.
Run the full system for at least 24 hours before plants go in. Check temperature and humidity at several points in the photoperiod. Note whether the tent's climate drifts when external conditions change — a cold night or a sunny afternoon in the room where the tent lives can shift things considerably. Understanding these patterns now is much easier than troubleshooting them later.
Inspect your cables. Nothing should be dangling into a water zone, nothing should be kinked, and nothing should be carrying more amps than its rating. Cluster cables with zip ties and route them along poles rather than across the tent's open space. This also saves you from pulling the wrong cord during a routine check — a surprisingly easy mistake with an elbow full of pruning trimmings.
Make sure the exhaust is actually leaving the room. Hold a tissue near the duct exit and watch it pull. If the tissue doesn't move, something in the chain is blocked or disconnected. Trace the line until you find the issue.
Wipe the interior one more time. Dust inside a new tent is normal, and getting it out before plants go in is much easier than trying to clean around a full canopy.
Common First-Timer Mistakes Worth Avoiding
A few recurring mistakes account for the majority of failed first grow tent setups, and they're almost all preventable.
Underestimating ventilation needs is number one. A light that produces 200 watts of heat requires more air movement than people assume, especially in a small space. When in doubt, size up your fan, not down. You can always turn a strong fan down with a speed controller; you cannot make a weak fan stronger.
Skipping the carbon filter on the assumption that smell won't be an issue is another classic. Smell travels further than expected, and carbon filters also trap airborne spores and particulates that contribute to plant health over time. Install it from the start.
Ignoring the light schedule is a surprisingly common one. A timer is cheap, reliable, and removes human error completely. Manual switching works for about three days, after which someone forgets, and the plant pays for it. Get the timer in place before the first seedling goes in.
Overcrowding the tent is almost universal. First-timers see empty space and fill it with plants, only to find themselves with a jungle that won't allow light penetration or airflow. Err on the side of fewer, bigger plants. Two healthy plants outproduce six weak, crowded ones every time.
Finally, not tracking anything. A simple notebook — dates, temperatures, humidity, watering, any observations — turns your first grow into a learning system rather than a guessing game. By your second run, you'll have actual data to improve from.
Power, Noise, and Everyday Living Around Your Tent
A practical reality first-timers rarely think about: the tent has to coexist with the rest of your life. An inline fan running 24/7 at full speed makes a constant whooshing sound that can drive people out of a room. A fan speed controller, often called a thermostatic controller, lets you regulate airflow based on actual temperature rather than running full-blast around the clock. It's quieter, saves electricity, and keeps the climate more stable.
Consider also where the intake air comes from. Pulling in dusty, cold, or dry air affects the inside of the tent just as much as the equipment does. An intake filter — even a simple mesh one — keeps insects and pollen out. If you live in a dry climate, pre-humidifying the room slightly helps the tent hold steadier numbers.
Electrical safety is not optional. Total up the wattage of every device plugged into your power strip and confirm it's well below the strip's rating. Grow equipment runs long hours, and overheated plugs are a genuine fire risk. A dedicated circuit is ideal if available.
Summary: Your First Grow Tent Setup, Condensed
A successful grow tent setup comes down to doing things in the right order and not skipping the unglamorous steps. Pick a tent size that matches your actual growing plans, not your fantasy ones. Gather every component before you start assembling, so you're never hunting for a missing clamp with half a frame built. Put the tent on a protected, level surface in a room you've already confirmed can handle the power draw and ventilation needs.
Build the frame methodically, hang the filter and fan first, and run the extraction out of the space before the light ever gets switched on. Place the light at the correct distance for your growth stage, route cables through the proper ports, and use a timer for every scheduled event. Add internal air circulation, monitor climate at canopy level, and take a full 24 hours to run the system empty before any plant goes inside. Fix light leaks, check airflow direction, and confirm the exhaust is actually leaving the room.
Most of all, give yourself permission to learn. A first grow tent is never perfect. Something will run slightly too hot, or the humidity will dip lower than you wanted, or a fan will turn out to be louder than advertised. These are not failures — they're the feedback that turns a beginner into a grower who actually knows their equipment. The checklist above gets you to a working setup; what happens inside the tent after that is where the real experience begins. Take notes, adjust as you go, and trust that by the end of your first cycle, most of what felt overwhelming at the start will feel like second nature.